How to Make Agate Coasters with Adults & Crafts
Updated by Cratejoy Editor

To celebrate National Craft Month, we are using one of our favorite craft materials — epoxy resin — to create some bright and shiny agate resin coasters. This project is fun and easy to complete, and produces some stunning results that will make you proud!
Pro tip? While the process is simple, the final product will benefit from close attention to detail.
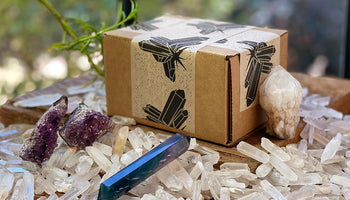
For this project, you will need :
- 6oz of epoxy resin
- Agate coaster mold
- Glitter
- Paint colors of your choice
- 3oz mixing cups
- Stirring sticks
- Gloves
- Gold oil-based marker
- Sandpaper
- Scissors
- Long stem lighter
- Tin foil or wax paper (to protect workspace)
- Protective mask
Read below for the steps to create your own resin agate coasters! Make sure to read through all the instructions thoroughly before starting your project.
1. Protect your workspace with wax paper or tin foil in a well-ventilated room. Also, make sure to wear your gloves! If anything gets on your skin, immediately wash with soap and water.
2. Mix the resin together by following the directions on the pack. Keep in mind that once you mix the two components, you have about 45 minutes of time before it starts to set.
3. Once your resin mixture is thoroughly mixed together (at least three minutes of mixing), fill your cups up with the mixture. Fill two cups 3/4 the way up, one cup 1/2 the way up, and two cups 1/3 the way up.

4. Time to add the paint to the resin cups! Add two drops of the white paint to one of the ⅓- full cups, two drops of black paint to the other ⅓-full cup, and add three drops of purple paint to the cup that is 1/2 full. Mix the paint into the resin mixtures with clean stirring sticks until they are completely mixed together. Tap the bottom of the cup to help eliminate some of the air bubbles.

5. Time to pour your resin mixtures in the mold. Start by pouring a small amount of the clear resin into the four inside corners. Slowly pour the black mixture along the outside edges of the mold. (Pour slowly to make sure the resin spreads evenly across the four coasters!) After that, repeat this by pouring the purple mixture along the inside edge of the black mixture. Then, pour some of the other clear mixture on the inside edge of the purple mixture. Finally, pour a thin line of the white mixture on the border between the purple and clear mixture. Fill the empty space with some leftover clear resin, but make sure to leave about a half cup of clear resin to use with the glitter later.

6. Now time to add some artistry to your mixture! Make strokes through each color with a clean stirring stick. Manipulate the colors together so they gently swirl and mix together.

7. Take the remaining clear resin, pour half of this cup into another cup, and add a small amount of glitter into one of the cups. Mix well. Add the glitter resin into each corner point. Pour the one half of clear resin between the glitter layer and the other clear layer between the glitter corners and the colored resin. This will create the clear portion of your coaster. Pour the remaining resin into the molds and make sure to fill each of the molds evenly to the top of the mold.

8. For this portion, please wear a mask to remove and release some of the bubbles. Use a long stem lighter and lightly put the flame over the top layer of the resin to create a flawless finish. Repeat again in about 10 minutes to catch any stray bubbles that have arisen.

9. Cover your resin coasters with a box to protect it from dust or other particles, then allow it to dry for 24 hours. When the molds have hardened, carefully pop out the coasters and wet-sand off any uneven or sharp edges. (Note: To wet-sand, just add a little water so the epoxy dust doesn’t get all over your workspace.) Then, for the finishing touch, use the gold paint pen marker to create a gold edge along the outside of the mold for a dazzling finishing touch. Lay the coasters on a flat surface and allow the coasters to completely cure for about 72 hours.

10. Time to show off your new resin agate coasters as a trendy way to protect your surfaces!